Every parent in this universe wants their child to read and comprehend better. As special education teachers, we need tools that are meaningful in helping our students improve their reading comprehension. Over the last decade and a half working with students with disabilities, I have found Graphic Organizers to be my silver bullet for improving comprehension in SpEd. Read more on improving comprehension in sped for students with significant disabilities using graphic organizers.
So much of how we assess comprehension is based on a student’s ability to process and respond to oral questioning OR based on them being able to read and understand a written question, and then write a response.
That simply doesn’t work for all students, especially in a self-contained special education classroom. The other thing we sped teachers need in our classrooms is a meaningful way to work on comprehension without a student needing to reread lengthy passages. We need to break free of the consumable worksheet.
That’s one of the main reasons I love graphic organizers so much. It allows a student to read a single passage and then manipulate that information in several different ways in order to complete the work. For me as a teacher, that’s a great way to assess comprehension beyond just factual information.
Benefits of Using Graphic Organizers
As I see it, there are 5 amazing benefits of using graphic organizers.
- Graphic organizers are a great alternative to a traditional worksheet. Because you can use one graphic organizer over and over again with different reading materials, it allows our students to become very good at them. Then our students don’t get caught up on what to do and are able to focus on improving comprehension.
- Graphic organizers lower prep. Let’s face it… if you are a special education teacher you are drowning in paperwork. Using a standardized set of graphic organizers means you do not have to prep as much material. No matter how you slice that, it’s a #TeacherWin! One of the things I always carry with me whenever I do classroom visits or student interventions is a set of graphic organizers. They’re so versatile; I can better understand a student’s overall comprehension level when I use them. I can also see the areas for improvement by which graphic organizer I choose… all with minimal prep.
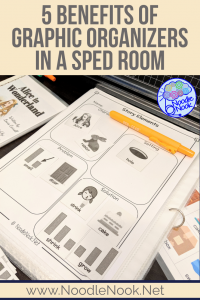
- Graphic organizers can address multi-level needs. If you are a special education teacher, then you are working with students with multiple levels of need. It can feel downright impossible to find materials to meet everyone’s needs. I have found that using graphic organizers allows me to very easily make activities more complex as students need it. I can also lower the difficulty when tasks are too hard. See the example below for more on easy differentiation.
- Graphic organizers can target different IEP goals. Data, data, data! It’s a song that sings in the back of every special educator’s mind. All too often a small group of students you’re servicing have totally different IEP goal needs. I love how easy using graphic organizers makes it to target different IEP goals. It also makes it easier to gather the data I need. I used to have a small group of students who were working on inferential comprehension, factual comprehension, summarizing, and a specific reading comprehension skill known as QAR. It was so much easier for me to read the material that aligned with the general curriculum and then target each student’s specific IEP goal using a different graphic organizer, all at the same time. Anyone watching along, doing a classroom walk-through, or simply observing, would see my students engaged in the same activity as all of their general ed peers. In truth, they were targeting a very specific IEP goal. #Inclusion
- Graphic organizers are never-ending. There is nothing more painful to a teacher than the lesson you’ve planned ending 10 minutes too soon. It is pure agony. But what always works in a pinch is a graphic organizer. They’re easy to add on to any assignment and perfect for early finishers. Plus they are a great tool to remediate students who are working on underlying comprehension skills. Plus, if you put a packet of graphic organizers into a binder, they turn into a never-ending activity. Make sure you have a few different varieties on hand and you’ll be golden.
MATERIALS NEEDED
It’s very easy to set up graphic organizers in a way to reap all of the benefits listed above and move towards improving comprehension in SpEd classroom.
It’s so much more than just pressing print. If you want a really pack a punch with graphic organizers in your classroom, start by gathering the following.
- A Great Collection of Printable Graphic Organizers
- Colored Paper
- Dry Erase Markers
- Plastic Sleeves and a Binder
- OR Dry Erase Sleeves
- OR Lamination Sheets and a Laminating Machine
Believe me, these materials are going to be used quite often in your classroom. It’s better to set yourself up for success by making them reusable as opposed to consumable.
SETTING UP Your GRAPHIC ORGANIZERS
I like to print out graphic organizers that target a variety of skills. My preference is to keep them in a binder or on a ring so that they’re super accessible. By organizing them according to difficulty from easy to most challenging, it becomes even easier for me to address the needs of a multi-level group.
I’ve used graphic organizers with elementary through secondary students. Depending on your level, you may find you want to organize your graphic organizers by skill as opposed to difficulty.
If you like to stay super organized (and tend to be more visual), here’s a tip. You may want to print your graphic organizers on colored paper based on difficulty or skill. It makes it so easy to grab what you need.
BONUS for Unique Learning System Teachers
I know a lot of you Special Educators are teaching with Unique Learning Systems or News2You. It might be the bulk of your reading material. Here’s a great idea. You can use your graphic organizers in conjunction with the vocabulary boards that come at the end of every story!
A complaint I hear a lot from teachers in districts where Unique is the only curriculum available is this: There isn’t enough stuff to last the entire month.
Using graphic organizers is a great way to extend comprehension activities. You can also work on underlined comprehension skills using the Unique program. Since graphic organizers are generic, you can enough apply them to most stories. You can also easily layer on several graphic organizers every month to beef up your overall reading instruction.
Supplementing ULS
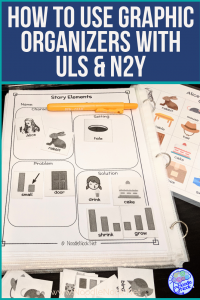
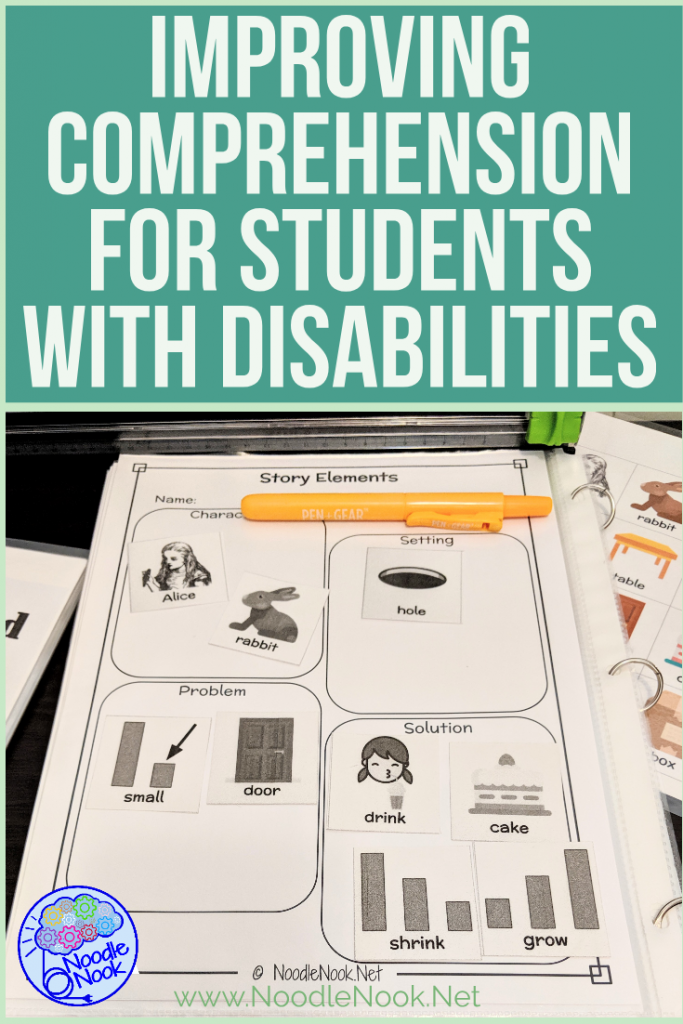
In the photos for this post, I am not using the Unique Stories for reading. Their stories are more geared toward Science and Social Studies, so I supplement my grading periods with an adapted novel. Those books also come with a vocab board for each chapter.
The pictures for the vocabulary icons become the response cards. A student now has a manipulative to use as they complete the graphic organizer. Students who are hand-over-hand all the way through to my students who are almost in class support level can all participate. Some students use the icons to respond. Other students dictate their responses. Some students may write their responses on the graphic organizer. Those students who are writing their responses may have the vocabulary board nearby to reference as they’re answering. Other students may use the book as a reference while they complete the graphic organizer.
No matter the student’s response mode or the specific level to which they are working on improving comprehension, graphic organizers are a great vehicle. And, once again, because the graphic organizers are used repeatedly, the students become very familiar with them. They learn what it is you want them to do and are less dependent on me as the teacher or my support staff to help them throughout the activity. That allows us to focus more on the students who need extra help, as well as sitting down with students 1:1 to give them more specific instruction on how to improve their comprehension.
Improving Comprehension with Graphic Organizers in SpEd
As you can see, there are tons of ways to use graphic organizers for improving comprehension in SpEd or Gen Ed classrooms. The benefits are through the roof, not to mention the way it eases the workload for us as the teachers makes graphic organizers a #TeacherWin!
Setting up is easy, just press print! From there, making them reusable and not consumable will save you more time and money in the long run.
If you want to check out some amazing graphic organizers, pop over to the Noodle Nook store. You can also do a simple search on Google for specific graphic organizers and you may find some great freebies. If you want to save yourself time and effort as well as ensure a consistent look and quality to your classroom’s graphic organizers, check out the ones in the Noodle Nook TpT Store.
Stay Strong and Teach On!

P.S. If you loved the graphic organizers in the photos or just want to have some quick printable GOs… then check out this product in the Noodle Nook Store: HERE. They are the perfect tool for improving comprehension in SpEd or Gen Ed!
Tips, tricks, resources, and FREE tools for teachers in Special Ed and Autism Units. Listen, read and watch to learn how to be more successful at Noodle Nook. And be sure to subscribe to the monthly newsletter TODAY!


